Volvo 270 Outdrive R&R (for bellows replacement) By: Rob Farrow
Preparation: Remove propellers – not mandatory but a good idea to prevent damage or injury (note which is port and which is starboard) Have stable wooden blocking ready to support the outdrive skeg just clear of engaging the hold down latches and also about 8 inches higher than that. Remove linkage access cover. After loosening screws, cover may need to be tapped sideways with soft hammer or wooden block to break it free.
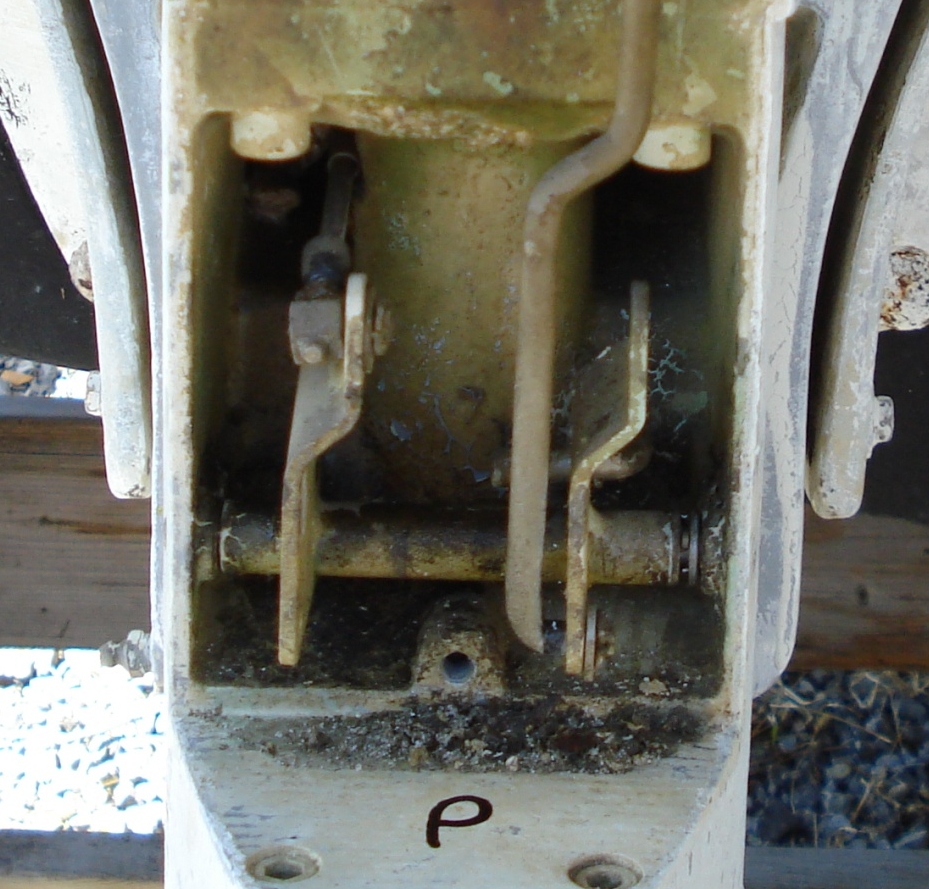
Remove cotter pin and washer, unscrew connecting block and lock nut from end of cable. Note position of all parts for reinstallation. Take a picture.
Remove shift cable retaining bracket from outside of outdrive housing where the cable enters. (Two 7/16 hex bolts) Turn outdrive to port to gain better access to these bolts.
From inside boat, pull shift cable back through outer hose until it is completely free of outdrive. Don’t pull any further than necessary.
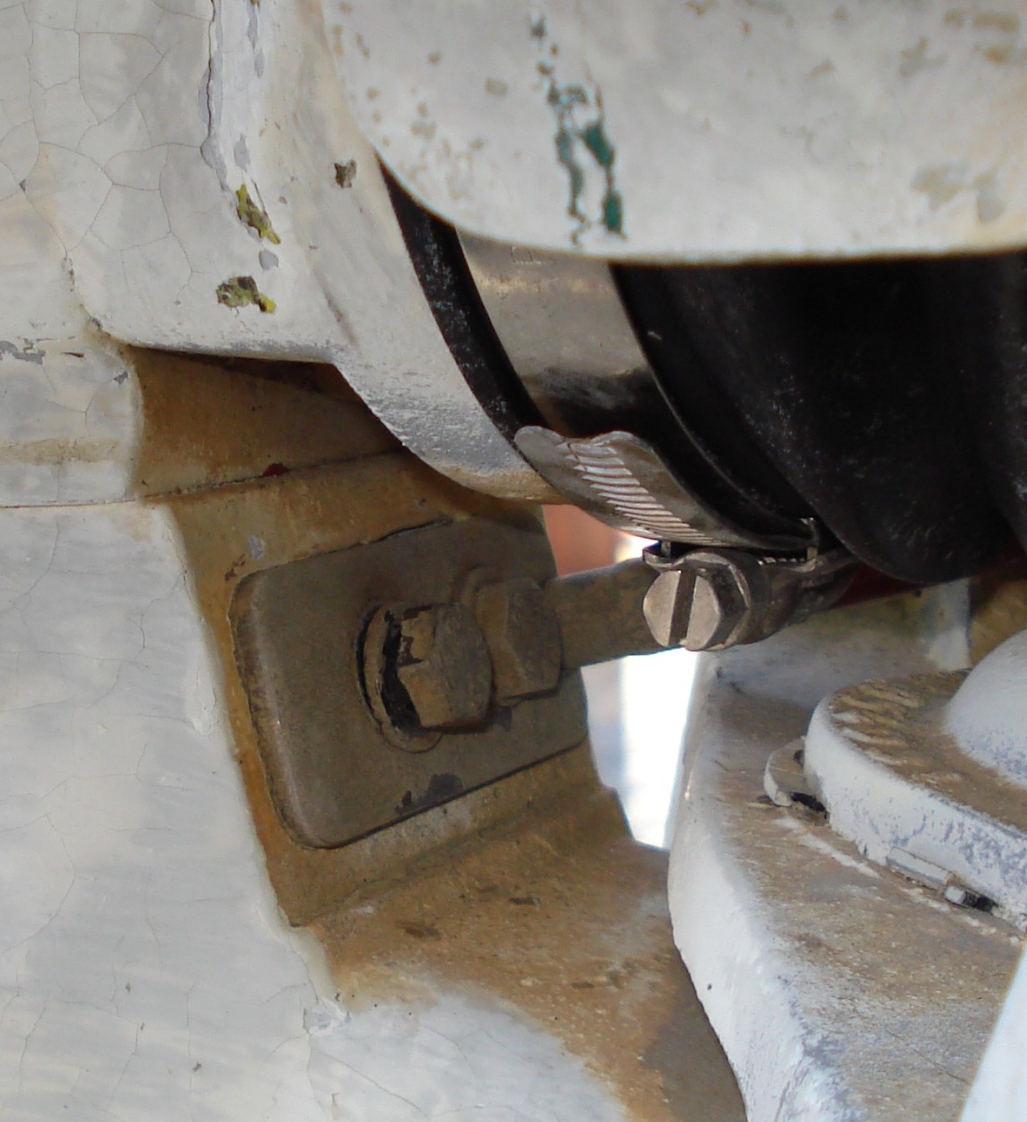
Disconnect steering “helmet“ by removing hex bolt and folding helmet forward. Remove outdrive end hose clamps. This will require tilting and securely blocking the outdrive and turning it to port (by hand since steering is disconnected) to access the 3 hose clamps. Note position of clamp tightening screws as this will be important for re-installation. Since rubber parts are being replaced, they can be cut to ease removal. Be careful not to damage attachment flanges

The outdrive is now attached only by the two hinge pins. First, remove the hinge pin retaining bolts Block the outdrive securely in a position just free of the hold down latches. On the 270 outdrive the hinge pins can be driven inwards by first turning the steering helmet (using the boats steering system). Note that on the later 280 outdrives, hinge pins may have to be pulled out with a threaded extractor.

The outdrive is now completely disconnected. Turn the boat’s steering system back to the centre position. Inch the outdrive outward on the blocking as the hinge pin locations have to drop about an inch to allow the lifting arm to get past the steering yoke. The outdrive weighs less than 100 lbs (about the same as a 9 HP outboard motor)
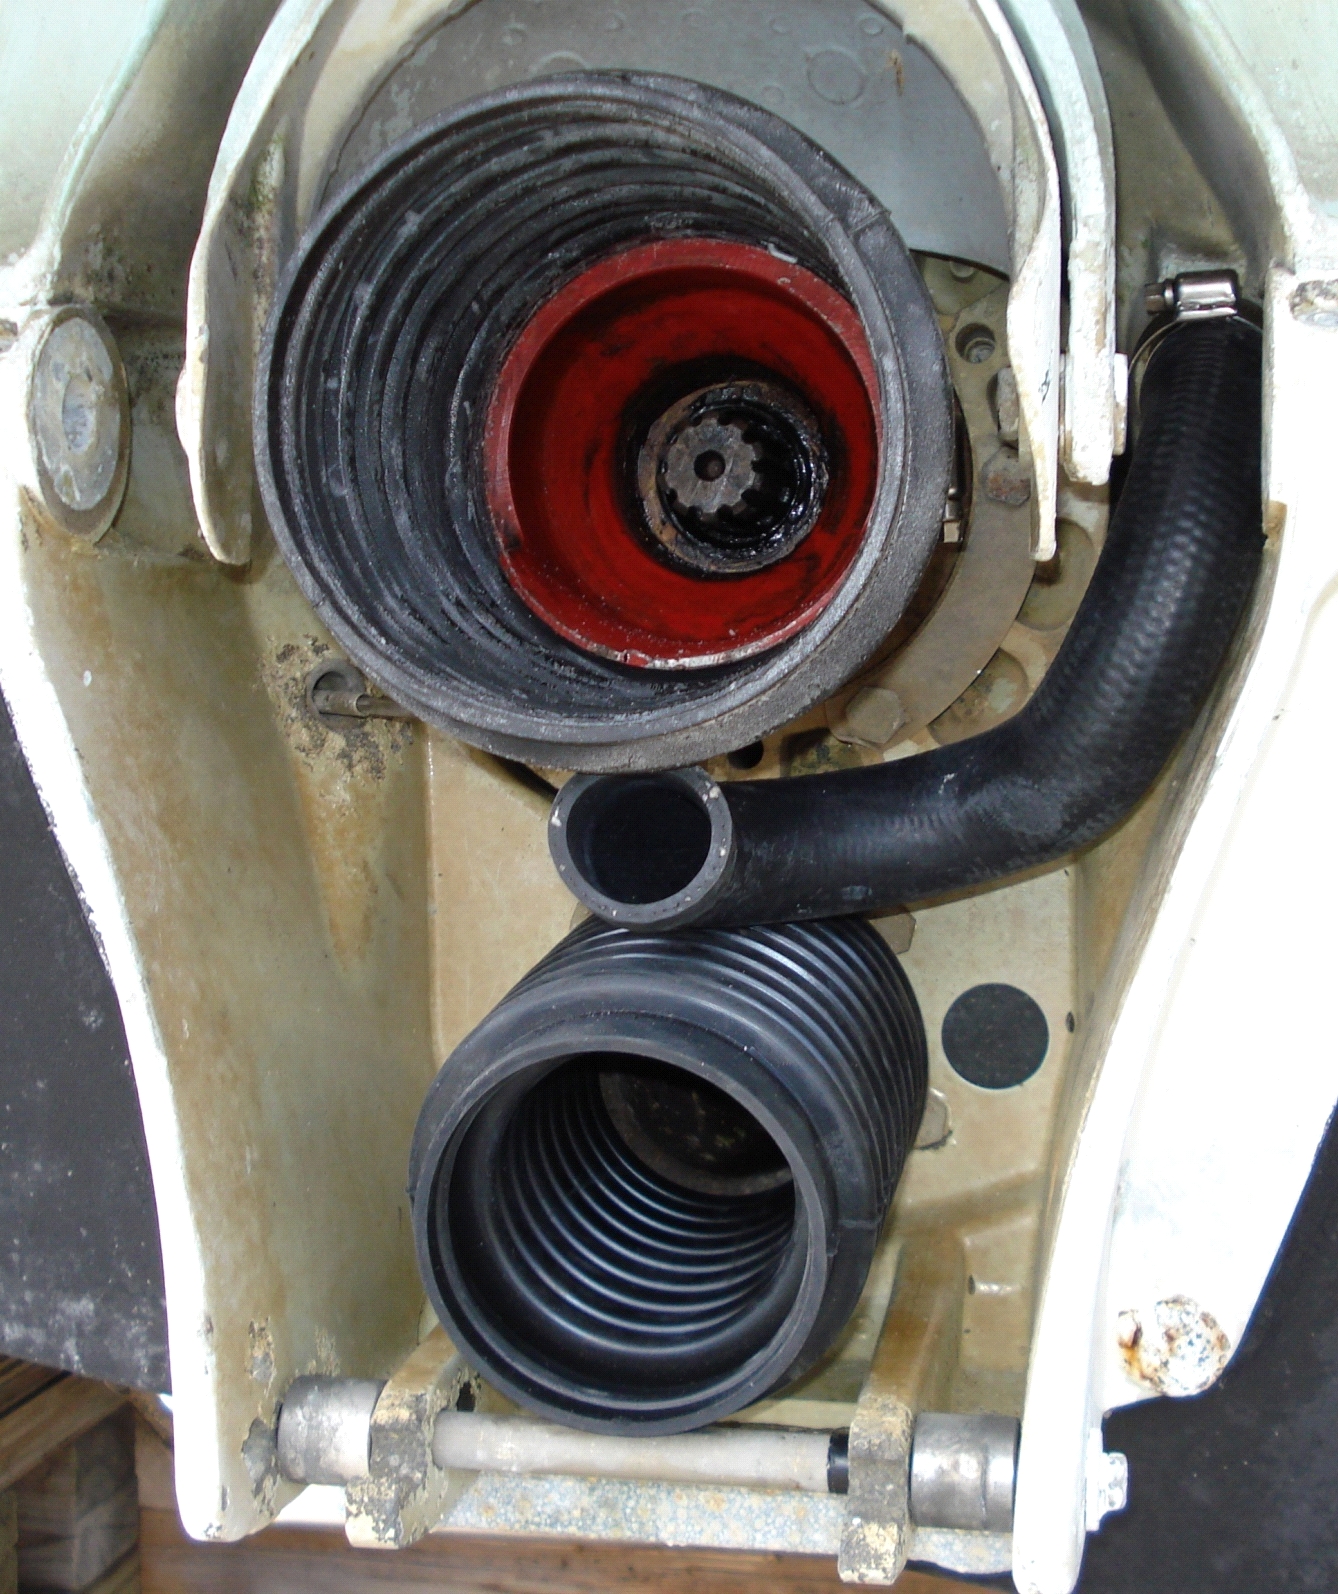
The old boots and intake hose can now be removed and new parts installed. Hose clamp position is critical so that there will be no interference after installation
Inspect the universal joints for any play, stiffness or wear. Grease them if possible (some joints have grease nipples and some do not).
Installation of the outdrive is the exact reversal of the removal process. Set the steering to the straight ahead position.
The most difficult part of the process is guiding the universal correctly onto the drive spline. Use a liberal amount of grease and reach up inside the bellows to guide the universal as the outdrive is brought into position (this is ideally a two person job).
The outdrive needs to be loaded from slightly below its normal position to allow the lifting arm on the port side of the outdrive to pass between housing and the steering yoke. To do this, place the outdrive on the same blocking that held it just off the hold down latches. Tip it toward the boat which will lower the lift arm until the narrow section will get past the steering yoke.
Now inch the outdrive forward on the blocking, straightening it up as you guide the drive spline into position and bring the hinge points up into place. Work slowly and carefully. A small pry bar or large screw driver can be used to ease the hinges into final alignment.
Remove any burrs or corrosion from the hinge pins and grease them. If the pins do not have a chamfer on the leading edge, use a grinding wheel to create one. Tap the hinge pins into place to secure the outdrive before working on the bellows and hose connections.
Tip the outdrive up/down/left /right to reach the various hose clamp attachments to the outdrive. Remember that hose clamp position is important and never reach into this area without the outdrive securely blocked up.
Pull the shift cable into position and re-attach. Now is a good time for a liberal application of white grease to all shift mechanism parts.
Re-attach the steering helmet and access cover.
Re-install propeller and you are DONE !
Rob Farrow
Catherine Ann
April 2009